In this post I would like to invite you to join me on a creative journey to make something new out of something old - and in the process end up on a completely different path from the one intended . . .
Don't get me wrong, I love producing my collage work - but the part that I don't like so much is cutting out all the fiddly bits. I use a very sharp scalpel on a glass cutting mat, but even so, this still takes time and sometimes you cut a vital appendage off and have to start again!
There are a number of electronic cutting machines on the market and at the end of last year, after botching a boat, I began to seriously think about investing in one of these. Logic told me that if I could cut down the time it takes me to cut stuff out - I could be more time efficient and make more pictures.
In January, Brother announced the European launch of their 'Scan N Cut' machine at the Craft and Hobby Association trade show (CHA) in the USA. This is a just awesome bit of kit and at present in the UK you can buy one via Create and Craft
In short, you can scan an image in and the machine can cut it out. You can also save the scanned image (if you have the copyright) and then change the size of it and cut it out - bigger or smaller - and did I mention that the machine can even draw the image - and cut fabric and lots of other materials too? The machine comes with hundreds preinstalled shapes that you can use - but the selling point for me was the potential to use my own images in a new way.
This got me thinking about how I could recycle and repurpose my favourite elements from previous collages and present these in a new way - to challenge the little grey cells and try something new.
So I scanned in my boats and people and birds and started to play.
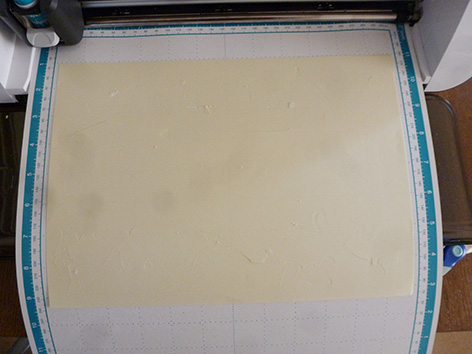
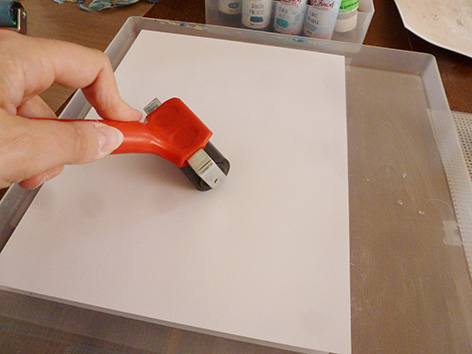
Picture 1: A cut sheet of images before the great peel reveal - I didn't stick my paper down well enough so the blade scuffed a bit on the tiny details - this was pure 'operator error' and not the machine!
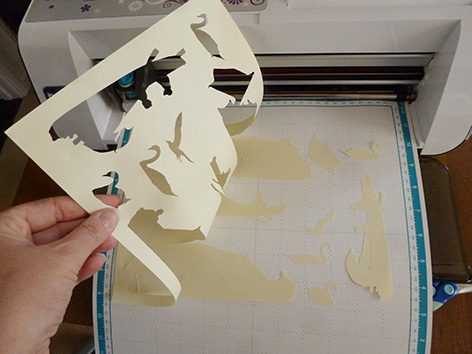
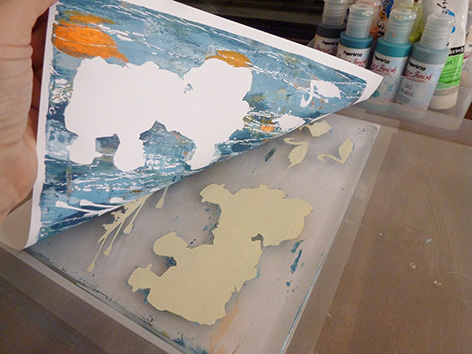
Picture 2: The great peel reveal . . .

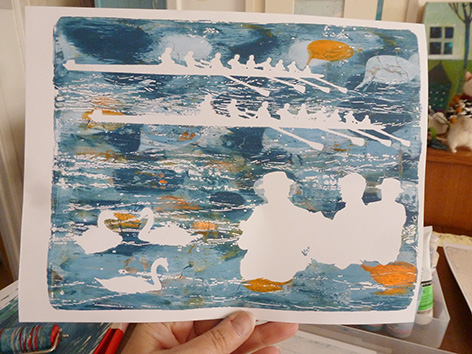
Picture 3: Incredibly detailed cuts can be achieved with the Scan N Cut - just look at the bunting!
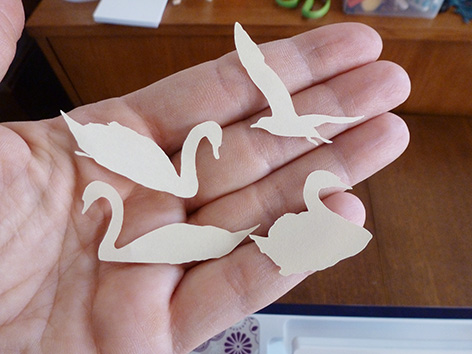
Picture 4: My 'signature' seagull with some swans for company.
So now I had all these fab cut images - how was I going to use them?
Since visiting the Oxford Printmakers, my chum Julie Rumsey's Print Shed and taking a lino cutting workshop at the St Ives School of Art (see earlier blogs) I have been wanting to try more printmaking techniques.
Last autumn while on holiday I purchased a Gelli Plate which was still in its box waiting to be invited out to play. A gel plate enables you to create monoprints without a press. What would happen I thought if I used my cut out images as 'masks' on the Gelli plate - could I produce an intentional print?
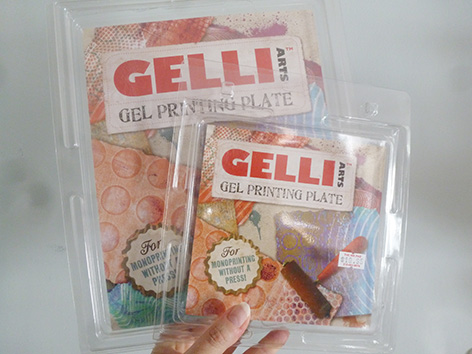
Picture 5: The wonderful Gelli Plate from Gelli Arts - do check out their You Tube channel for inspiration.
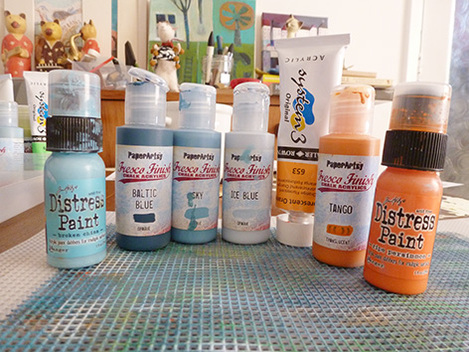
Picture 6: A selection of acrylic paints - you can use tube paints but I like the flip top lids on these. The bottles are standing on a bit of plastic mesh which can be used to add texture to the Gelli plate by removing paint before pulling a print.
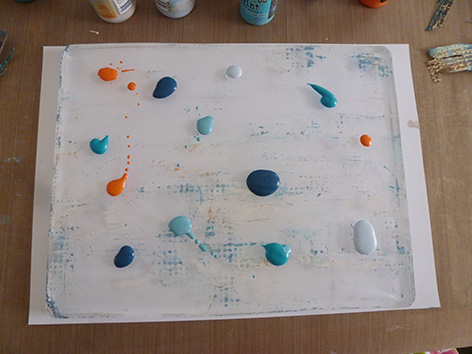
Picture 7: Why limit yourself to one colour I say! My favourite colour combo at the moment is blue, white and orange so I had to use this to start with - I did put out a bit too much paint in this instance!
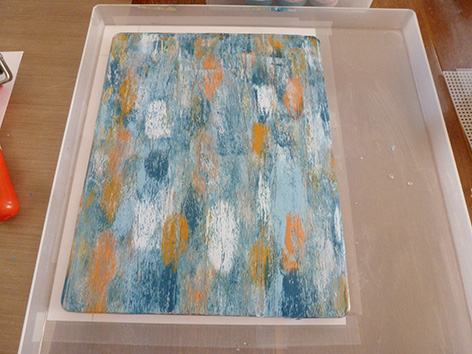
Picture 8: Brayer out the acrylic or use a brush until you get a pattern you like - you can also use various mark making tools / stencils etc at this stage to remove paint from the plate to create a texture on the pulled print.
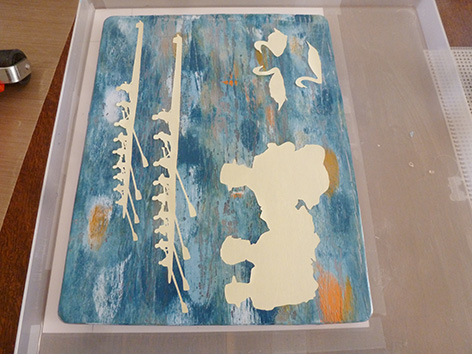
Picture 9: Lay the paper 'masks' directly onto the paint - this will preserve the white of the paper on your print sheet.
Picture 10: Use a brayer or your fingers to smooth the paper onto the Gelli plate.
Picture 11: Pulling the print . . .
Picture 12: Ta Dah!
Please note it took me a lot of attempts to get to this stage and although I like the result and it was what I set out to achieve (an intentional print) - there was just something 'missing' to my mind.
This is where the first deviation from the path took place because as well as getting a print - I also got something that I hadn't anticipated liking as much as I did . . .
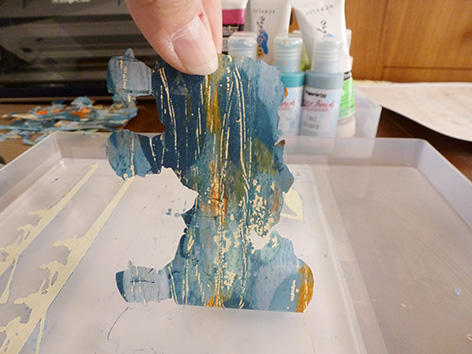
Picture 13: The paper masks are still on the Gelli plate and if you carefully pull these away you get something just fantastic!
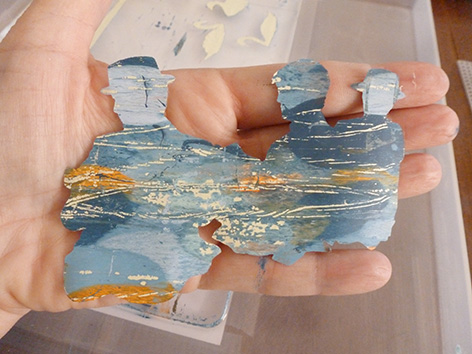
Picture 14: My monoprinted 'Blazers and Boater' chappies - I am very precise when I do traditional watercolour / acrylic and couldn't paint that if I tried.
One of my favourite things to use in my collages is vintage book text and I wondered what would happen now if I went through the stages above and instead of using white card to print - used a book page as my substrate?
This did work but the text placement was a bit hit and miss - and book paper is quite fragile and prone to tear when pulling from the plate.
I sat looking at my lovely monoprinted boats and people - and my pile of books when the final deviation from my original path occurred. Instead of printing directly onto a book page - what would happen if I used intentionally placed text as a background and then collaged the lovely monoprinted elements over the top?
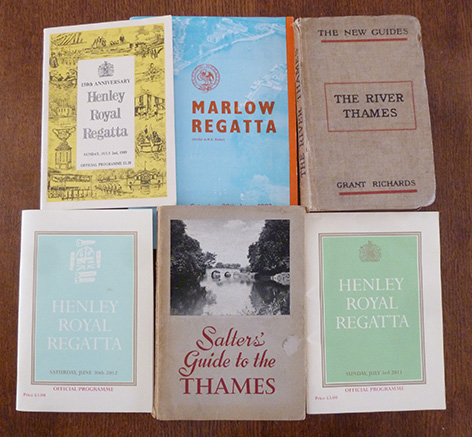
Picture 15: Some of my vintage book text (1920's and 1950's editions) and old Regatta programmes. These books are much to rare and precious to cut up and many of the pages are foxed with age and would not retain their integrity if used 'as is'.
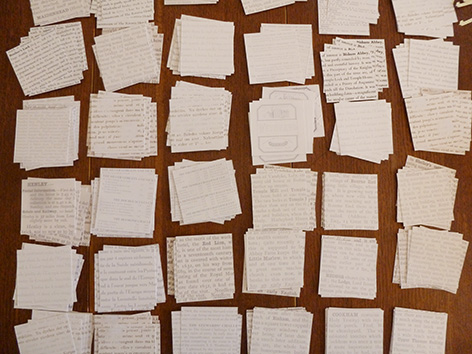
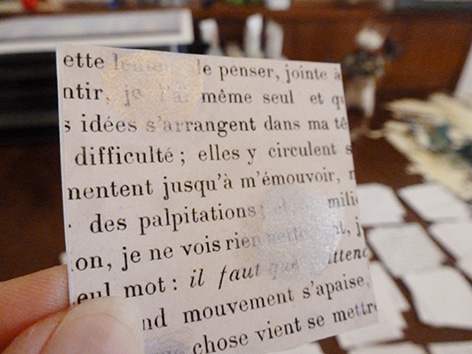
Picture 16: Instead I scanned specific sections, printed them out and cut them down into squares (my preferred compositional format is a square so this was a natural choice for me!)
Picture 17: Some squares were then painted with a metallic glaze from Paper Artsy to give a subtle shine in the light - I also like to use foreign text to break things up a bit too.
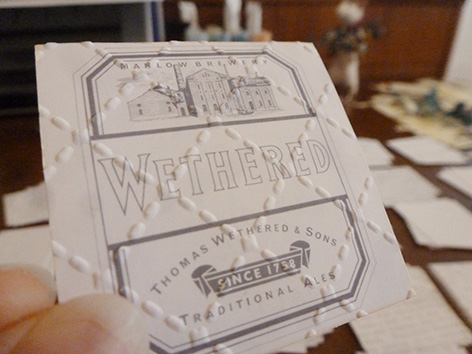
Picture 18: Some squares were embossed to add some dimension.
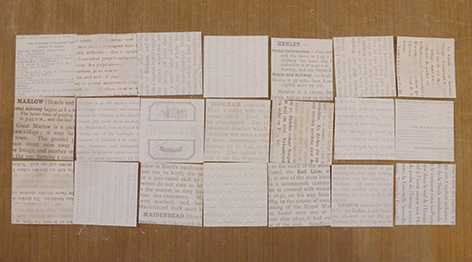
Picture 19: The squares were then arranged to make a balanced background composition. The final stage was to get the glue out and stick the monoprinted elements onto the book page squares.
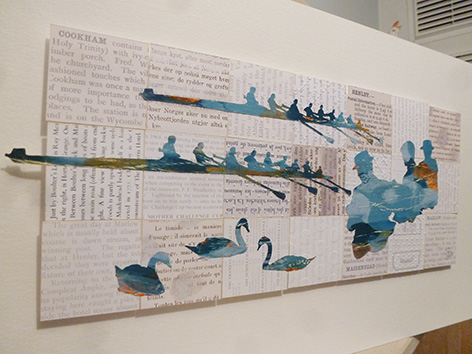
Picture 20: The 'new' interpretation of Blazers and Boaters - float mounted.
The great thing about creativity is that sometimes you start a journey with a very clear idea of what you hope to get at the end - but, as you play, the process reveals other delightful possibilities that lead you to a better place.
I hope you have enjoyed reading this post and that it has given you an insight into the 'behind the scenes' thought, work and multiple processes that often go in to creating an original piece of artwork.


 RSS Feed